Pages

Monday, 25 May 2009

Acer Aspire One Review


Build and Design

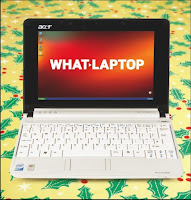
When you first get the Acer Aspire One out of the box you really appreciate the quality of the product you have just bought. The netbook feels solid and well built, and the glossy white looks very sleek with the rounded corners on the unit. The white itself is more of a pearl white, which seems to look really very good with the more traditional white keyboard. The screen is surrounded by a black bezel, and I would say that it looks good, but think it may have looked better white as well.

The size of the netbook is very satisfying, seeming to be larger than the Asus eee pc making it very much usable, yet small enough to make it still very much portable.
When closed it is very rigid and seems to have enough strength to avoid resist flex and compression.

The Acer Aspire One is a relatively hard netbook to make any adjustments to. Rather than having a panel to which you can unscrew and add extra RAM, you have to practically take apart the entire bottom plate of the netbook, so not too great for people who may want to run vista with some added RAM that it needs.

Keyboard and Touchpad
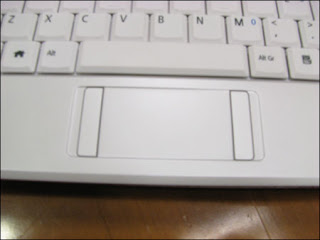

The keyboard is very spacious for a netbook, since the Acer Aspire One is a 9" screen PC in a 10" body. The keyboard is a little cramped compared to a full size notebook keyboard but is nothing that you can't get used to. The keyboard seems quite strong and seem to be very reactive.

The touchpad's design is slightly different to other netbooks on the market as it has the left and right mouse clicks on either side of the touchpad, rather than at the bottom. This is to save space but you do find yourself moving the mouse when you're trying to reach for the left click that isn't there. The sensitivity of the touchpad s great, and this can be adjusted easily.

Display
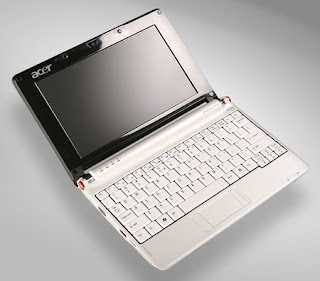

The screen is very clear and vibrant, making any text on the LED backlit screen very easy to read. Any colours look very nice on the glossy screen but this does mean that the screen reflects far to well, making it almost useless outside when it is sunny. Viewing angles however are very good especially the horizontal ones.

Performance

Like all netbooks the Acer Aspire One contains the Intel Atom processor, and although this would be a problem should you try to run any major games on it (plus the fact there is no dedicated graphics card in it) for practically everything else it runs fast and smoothly. Even photo editing tasks were handled with ease and the hard drive that is on my model is more than enough space.

Operating System
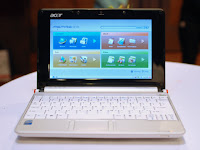

I bought my netbook with Linpus Linux Lite installed on it, mainly for the reason that I knew that it would run faster than Windows XP would and also because it was cheaper. With Linpus installed the netbook fired up very fast, around 20 seconds. However that is mainly where the good things about Linpus end. The basic applications installed are OK, but for anyone who wants to add more of their own choice of applications, audacity for example, it seemed nigh on impossible. So I decided to go and download the Ubuntu Netbook Remix, and try that out, and its great. It has all the good things about Linpus, the easy to use layout, the fast boot up time, and yet also is really easy to add your own applications and software, simply through the add and remove application. I'll be talking more about the advantages of UNR (Ubuntu Netbook Remix) in my review of the operating system in the future.

For those of you who want Windows XP, then I warn you that many people have said it does just what I can do on my normal computer, just slower. Now this may be a good thing because there are lots more things you can install on XP, but if all you want your netbook for is to do simple things and leave anything major to your desktop, then i recommend buying the Linpus version, because it is cheaper, and then downloading UNR, which is free, and following my guide to install that as t really is very good.


Hope you have enjoyed my review and can decided whether to buy one or not.
Thats all for now
Laters People

Saturday, 16 May 2009

How to install Ubuntu onto your Netbook

What you'll need

Right, let's get started. Here's what you'll need to hand before you start, both software and hardware:

  • An empty USBstick with a 1GB or greater capacity. I used a 2GB.

  • Once you've got all that together, you’ll need about 45 minutes to an hour of your time

Preparing the USB disk

First of all, plug your USB drive into whatever computer you're going to use to copy the install files across with. Probably the one that you're reading these instructions on. Go into 'My Computer' and note what drive letter has been allocated to the USB disk.

Then start up Win32 Disk Imager, and click the "..." button, and navigate to wherever you saved the Ubuntu .IMG file. When you find it, select it and hit okay. Then, under 'device', select the drive letter for the USB, and hit 'write'. Let it do its thing, it should take less than 5 minutes.

Preparing your Aspire One
On your Aspire One, make sure everything that you want to keep is backed up, because part of the process below involves wiping the drive of your netbook. Take off any data you want to keep and store it safely elsewhere.

Then power down the Aspire One and remove anything that's plugged into it, like SD cards or USB peripherals. Keep the power cable in, though. Plug in the USB drive you're using for the install, and power on.

Almost immediately, hit F12 when it prompts you to "Select boot order". From the menu that appears, select the USB drive. It'll prompt you to pick a language. Then the USB drive will give you the option to try out Ubuntu without installing. Do that if you like, then reboot and get back to this menu when you’ve tested it out.

The installation process
When you're ready to take the plunge, hit "Install Ubuntu" on this menu. Give it a minute to load everything into the device's memory. To start with, the progress bar will move between the left and right sides, but shortly after it'll start filling up.

Pick a language again, then hit 'forward' and select a time zone and city. Hit 'forward' again.

Pick the right keyboard layout for your machine. Test using the little box at the bottom, and check the " and @ keys, which are swapped around on American keyboards. If all seems in order, then hit 'forward' again.

Disks and file systems
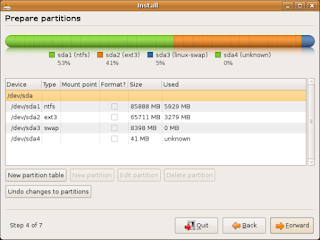
This is where things get a little tricky. If you finish and it won't boot, then go back and double-check this section carefully. Now - you have options that depend on what kind of disk you've got.

If you have a traditional mechanical hard drive then you can pick between installing Ubuntu alongside your existing operating system or replacing it. If you'd like to do the former, then pick the first option in the list - install alongside an existing operating system, then click forward and skip straight to the Progress Bars section of this guide, ignoring all the stuff about filesystems below.

If you're using a mechanical drive and you'd like to replace your existing OS entirely, then click the second option - "Use the entire disk". Make sure that the right disk is selected - not a USB drive or an SD card or anything. Be aware that this option will delete all data on that disk, then hit 'forward' and skip straight to the Progress Bars section of this guide.

Lastly, if you have an SSD then you get an even more complex choice. You won't have room to do anything except installing over the current operating system, so option one is out. However, you have a choice between installing the ext4, ext3 and ext2 file systems.

Ext4 is known as a 'journaling' file system. It writes into a 'journal' whenever it modifies anything, so it's much safer if you lose power suddenly and you want your files to be okay. Ext3 is also a 'journaling' file system but it's older, so I don't recommend its use over Ext4.

Ext2 doesn't do any 'journaling' - so it uses far fewer read/writes. As an SSD wears out quicker than a regular hard drive, selecting Ext2 will make things run a smidge faster and increase your drive's lifetime. As a result, though, files can corrupt if you suddenly lose power on your machine. Even if nothing corrupts, you'll have to sit through an irritating file check every time you startup if you don't power down properly.

It's up to you - select Ext4 for a safer drive that wears out quicker, or Ext2 for a slightly faster drive that'll last longer, but is more prone to errors if you lose power.

Once you've decided, click option three - "specify partitions manually". Don't be scared by the word 'advanced', if you understood what I just said, then you'll be fine. You should have two drives in front of you, one big one marked "ext2", and one smaller one marked "swap".

Double-click the big "ext2" drive, and an 'edit partition' box should pop up. Select from the "Use as:" drop-down either "Ext2 file system" or "Ext4 file system", depending on which you want (see above). Then tick the box marked 'Format the partition' and then select "/" as the mount point. Hit okay, then forward. That wasn't too bad now, was it?

If you've got no idea what drive you've got, then just click the middle option - "Use the entire disk".

Progress bars
Tough bit over. Type in your name, a username (all lowercase, please), a password and name of the computer. Choose whether you want it to prompt you for your password every time you start up or not. Then hit 'forward'.

It'll show you a summary screen for what it's about to do. Scan it quickly and make sure it's about to do what you're expecting it to, then take a deep breath and hit 'forward'.

Progress bars should appear. Go make a cup of tea. It took me about 20 minutes to install to an Hard Drive, or it'll be slightly shorter for a SSD. When it's complete, choose the restart option, and remove the USB disk when it tells you to. The system will then reset.

Complete!

Voila! Your installation is complete. You'll find that Ubuntu boots a tiny bit slower than the default Linux OS, but it'll be a bit faster than Windows. It's slower than the default OS because it's so full of good stuff.

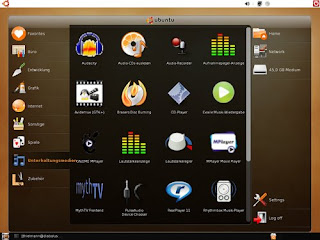
Click around a bit - the left column shows categories of programs. The middle pane shows the programs that are in each category - click one to start it. Lastly, the right-hand pane will show you storage locations. Click one to load it.

Have a little fiddle around in the settings, too. There's plenty of customizable stuff. Change the color scheme away from the brown if you like, or turn off 'tap-to-click' on the track pad. If you'd like to edit the menus, you can do that by clicking "Main Menu" in "Preferences".

Look out for my review of the Acer Aspire One coming soon..

Thats all for now

Laters people

Tuesday, 12 May 2009

Acer Aspire One Unboxing Video


So as promised I have made an unboxing video for the netbook.
I Hope to bring you the review soon and more content after that.
The specs of the netbook is in the description on the video and I'll also list them when I do my review. Enjoy:


That's all for now
Laters people.

Monday, 11 May 2009

Acer Aspire One and Linux

Hey guys,
Sorry for being inactive for a while, I've been rather tied up in school work and the such and so haven't been able to release any new content for a while.
However that is soon to change.
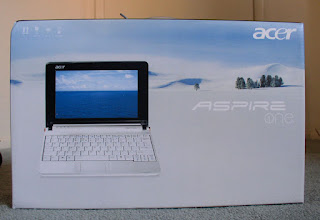
As some of you may know, I have been trying to raise enough money for a netbook, the Acer Aspire One to be precise. Now amazingly I did eventually reach my target, and proceeded to buy the netbook off someone on eBay, brand new, sealed in box(white).(excellent seller by the way)


Basically, this netbook has stole my heart, as it were, and I'm really happy with my purchase.

Now more to the point, I have become so attached to it at the moment that I am going to start posting some Acer Aspire One netbook and Linux posts for you. Some ideas/plans I have at the moment are:
  • Unboxing Video
  • Review
  • How to install Ubuntu Netbook Remix
  • How to install games on UNR.
If you guys have anything else you want to suggest that i do, please feel free to leave a comment or send me a message.

So until I make an unboxing video
Thats all for now,
Laters people.